The GR6 trans front case assembly is very simple to remove and install. This assembly houses several parts to which we can perform our services without the need for the complete trans to be shipped. By removing this part, you are shipping us the oil pump assembly, clutch basket assembly, and ETS which takes the problems of incorrect installations away from the customer and the replacement parts work as intended.
To remove the assembly from the trans is easy.
Oil Pan:
- Remove the pan first by removing the 21 pan bolts which use a 10mm socket

- Pull the oil filter DOWN an out. Nothing is holding it in, just pull:

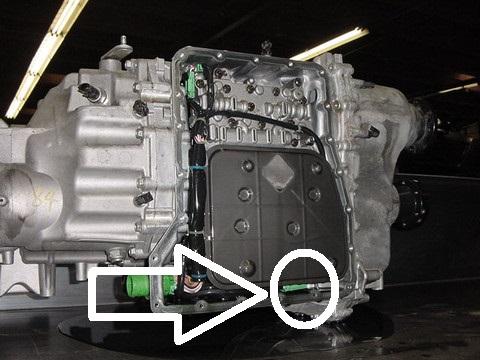
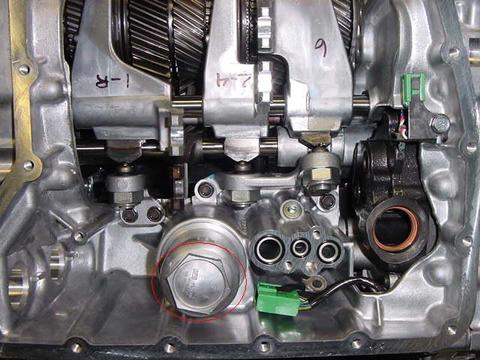
- Locate the 16 pin connector circled in the picture below. Remove the connector bracket using a 10mm socket
- Disconnect the green 16 pin connector (located on the clutch cover side corner of the assembly)

- Jam the connector (coming in from the front cover) down into the front cover assembly cavity. This is to prevent it from snagging on the housing when the front cover is removed (prevent damage)
Front Cover:
- Remove the 20 bolts with a 12mm socket
- With a pry-bar, very carefully pry the case apart using the case areas designed for this

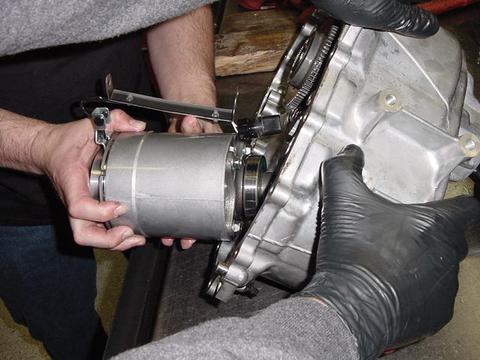
Removal:
- Very carefully pull the assembly out of the trans straight and out
- Be careful with the 16 pin connector and do not damage it
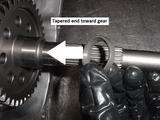
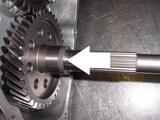
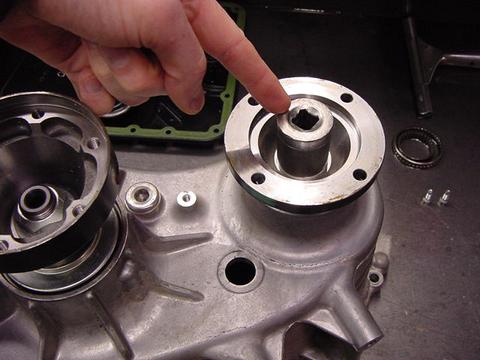
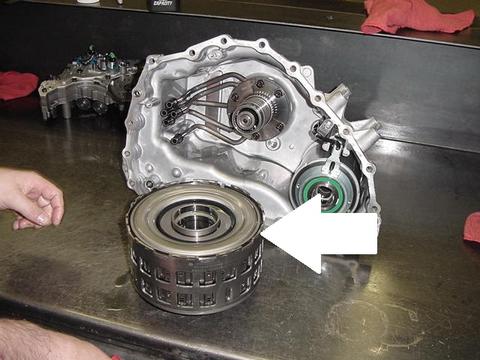
- TIP: Note the washer which is on the output shaft (the shaft which is sticking out of the trans). The washer needs to be installed with the tapered end facing toward the gear. If there is no washer on the shaft, it is still sitting inside the ETS unit. Pull it out and put it on the shaft (3rd picture).
Shipping The Assembly:
- Very carefully wrap the front cover assembly in a large bag and seal it well. If you need to wrap it in multiple bags, that's even better. We can't have any fluid leak out of the bag or the shipping company will refuse the package and it will bounce back
- Pop the sump filter in a large zip-lock bag
- Very carefully pack the components using a lot of packing material as these assemblies are fragile
- Make sure you have a large enough box and there is plenty of packing material in between the parts and walls of the box
- Would you feel comfortable taking the packed box and dropping it from 6 feet without any damage to the parts inside? If not, then it is not packed good enough!
- Insure the package for $13k
- Need help? Please feel free to contact us via email
Ship the box to:
Jacks Transmissions
3920 N Weber St
Colorado Springs, CO. 80907
719-268-6011
Trans Filter:
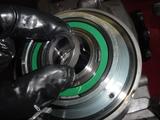
- Inside the canister circled in RED is another filter
- Remove this filter by using a 36mm socket or wrench
- Inside is the filter
- Remove filter by pulling it out
- Install new filter by pushing it back in
- Assembly is reverse of removal
ETS Unit Removal:
- Use a 10MM socket to remove the 2 bolts from the electrical wire support bracket.
- Remove the retaining clip from the electrical connector.
- Use a 1 1/16" socket to remove the drive-shaft flange.
- Pull the flange out and then pull the ETS Unit out of the case.
Tech article HERE on how we can rebuild your failed ETS Unit!
Clutch Assembly Removal:
- Remove the 4 T30 bolts from the clutch valve body (arrows show which ones below):
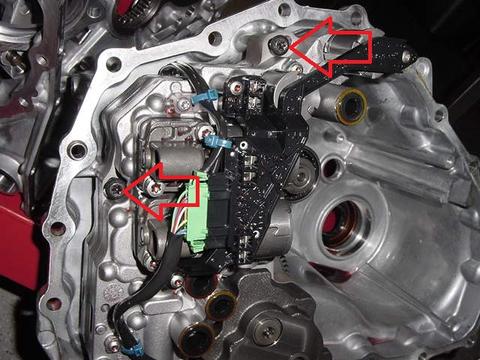
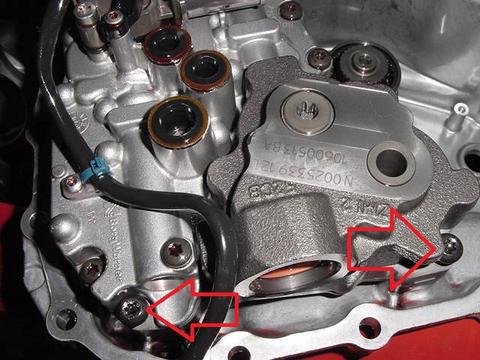
- Very gently and evenly pull the valve body away from the case. It will be a bit tight.
- Remove the small clip from the input shaft found at the center of the clutch basket (circled below):
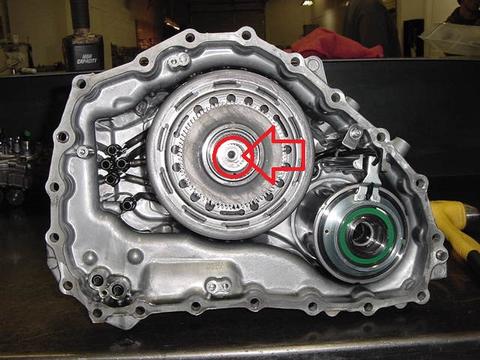
You're done! Please ship basket to Jacks Trans for a complete and properly built unit for your goals!
