These instructions were written to allow the average mechanic to perform the installation of the R35 GT-R clips at your location for convenience. We are not responsible for any damage or issues associated with the install of these parts. Do this at your own risk!
Note this can be done with the trans in the vehicle.
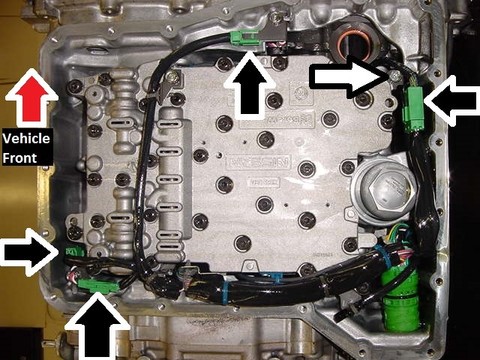
First, remove all paneling/diffuser at the trans end of the vehicle to expose the oil pan. Once you are at this point the following tools are required:
- 10mm socket
- T30 Torx
- 2 paper clips
- Torque wrench
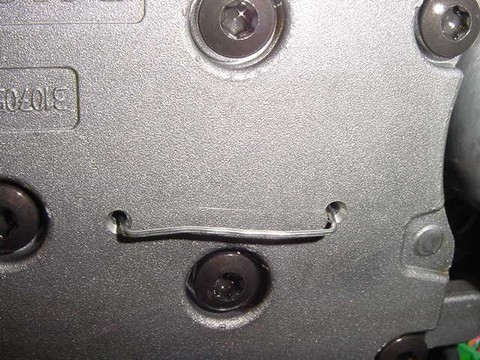
To start, we need to make a tool out of the 2 paperclips. Bend and cut both clips to match the picture below:

Drain the fluid from the trans.
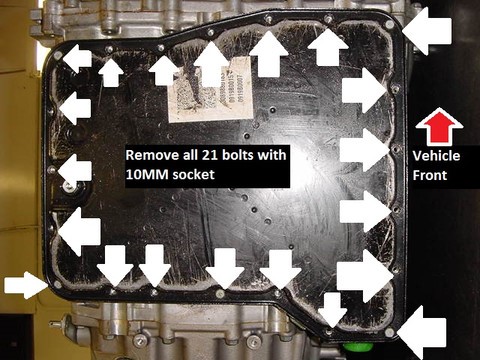
Remove the oil pan by removing all 21 bolts with a 10mm socket.
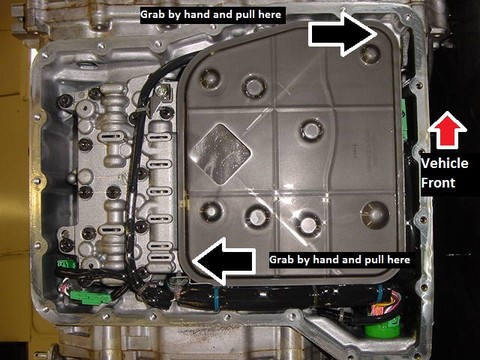
Pull the oil filter DOWN an out. Nothing is holding it in, just pull:
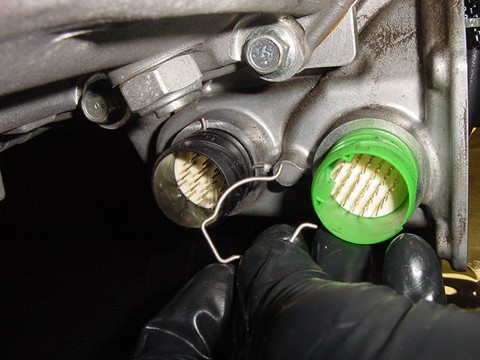
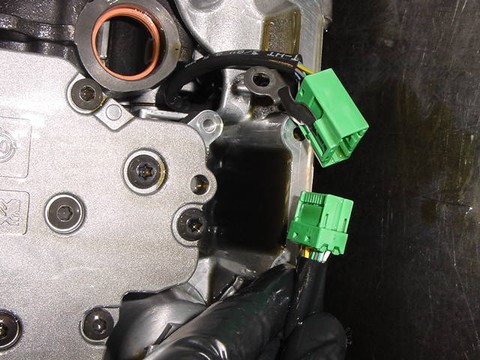
Next remove the retaining clips from the TCU/ACM electrical connectors as pictured below:
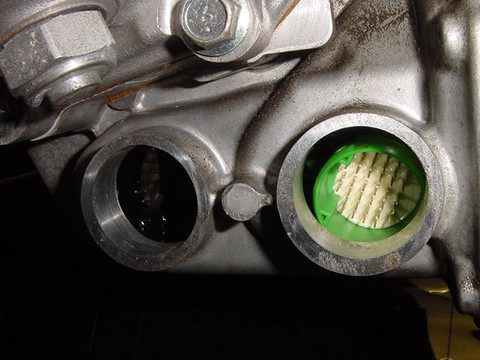
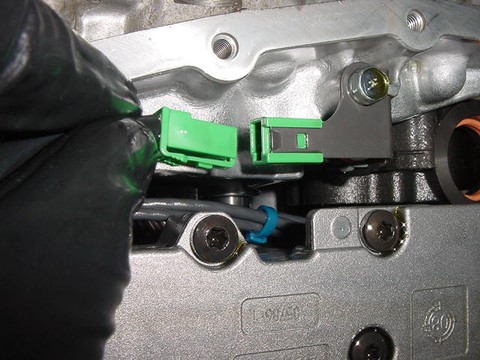
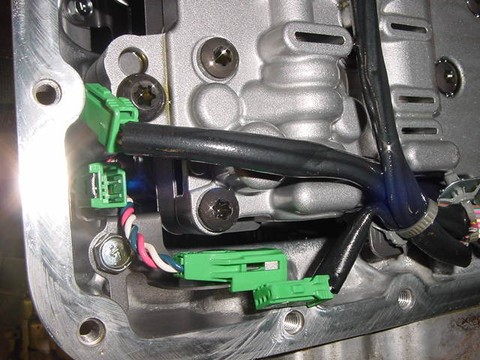
Push the connectors into the trans case:
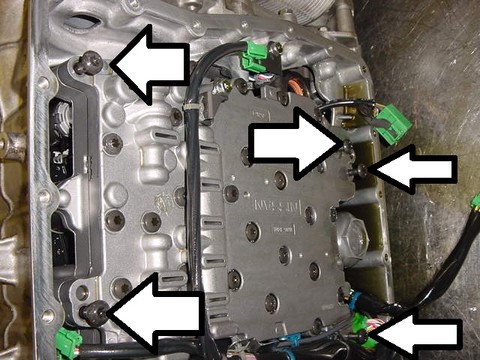
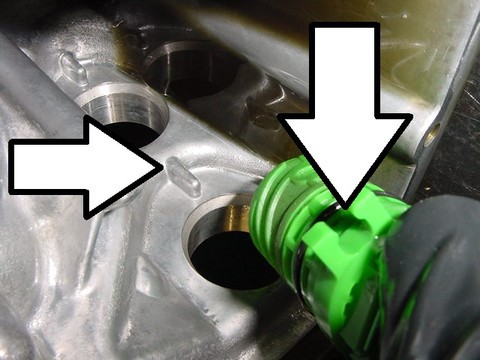
Remove connector bracket with 10mm socket (white arrow). Disconnect all 4 connectors (black arrows):
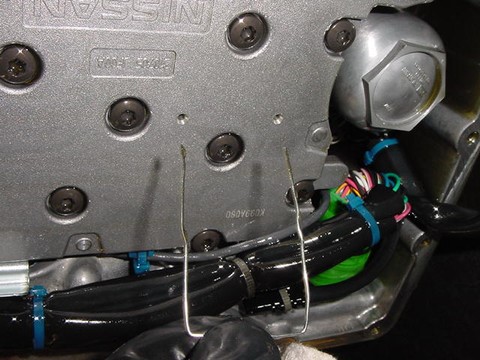
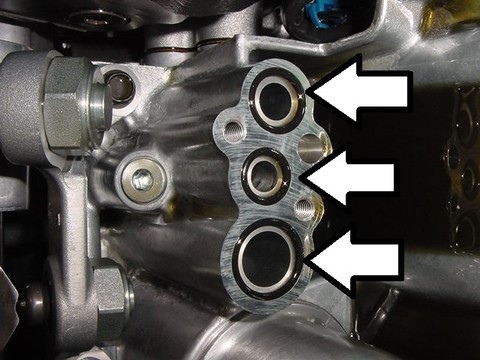
Insert your paperclips into the holes you see circled below:

They should go all the way in and look like this below:
Now remove the (5) T30 Torx bolts from the valve body as pictured below:
Pull the valve body from the trans and set on a clean bench.
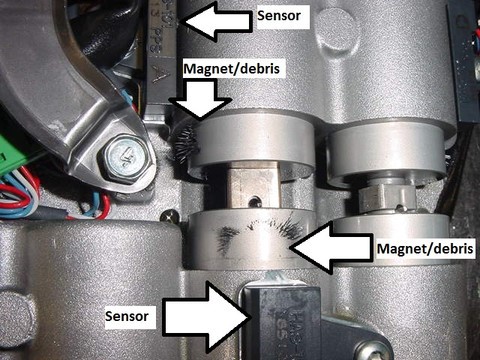
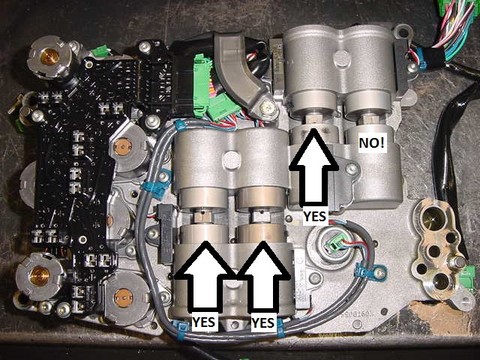
The valve body pistons have magnets inside which tell the sensors the position. It is very important that the pistons are not upside-down as the system will then not be able to detect the piston location and the trans will be damaged.
To verify is simple- The magnets inside the pistons will attract metal from trans wear. In the picture below, look at the debris on the piston and look at the sensor location. For each magnet, there is a sensor:
Note if the paperclip falls out, the piston may rotate. Finding the location of the magnet and assuring it is pointing in the direction of the sensor is very important. If your paperclips stay in place, then you are fine. You only need to worry about this if the paperclips fall out.
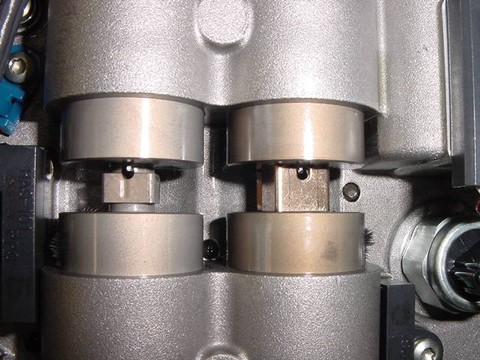
Install the TSB clips as you see below. Note the orientation of the clip notch needs to match the hole in the piston. Only install on the 3 pistons with arrows. It is not necessary to install a clip on the last piston. They will snap into place:
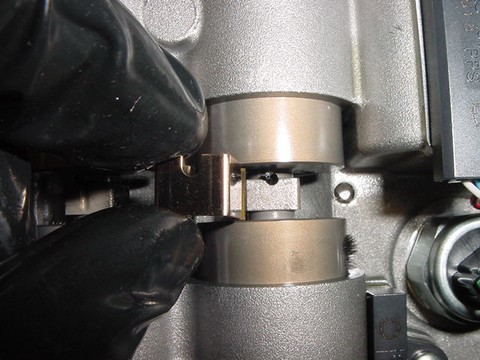
LEFT is piston without clip. RIGHT is piston with clip installed.
You are now ready to install the valve body, but be sure the 3 o-rings in the trans case are still there and did not fall out first. No need to replace these o-rings. They NEVER compress or go bad in any way.
Install the valve body back into trans and torque the 5 T30 bolts to 9.0 - 11.0 N•m (0.9 - 1.1 kg-m, 79 - 97 in-lb). Warning! Do not force the valve body into position. It should pop in with ease. If it doesn't, check the pistons to be sure they are centered and the paperclips are installed correctly.
Reconnect all 4 electrical connectors and don't forget to install the bolt for the connector bracket 9.5 N•m (0.97 kg-m, 84 in-lb)
Remove the paperclips.
When installing the TCU/ACM connectors back into the case, note there is a notch which needs to line up with the case. Picture below:
Install the connector retaining clips. Install the pan sump filter. Note a little pressure may need to be applied at the tube end where it mates to the oil pump. Make sure it is up and seated into the pump.
Install the oil pan. You can reuse the factory oil pan gasket. After reusing it more than 2 times- replace.
The pan should pop right on without issue. If it sticks out, then the sump filter is not in correctly. Tighten the 21 pan bolts to 8.5 N•m (0.87 kg-m, 75 in-lb)
Refill with fluid. Note Jacks Trans sells high quality, high detergent (25k mile) DCT fluid for $380 (10 liters) Questions/comments? Need more parts? Please EMAIL us at sales@jackstransmissions.com We include instructions with most of the parts we sell.
